> ## Documentation Index
> Fetch the complete documentation index at: https://bunny.net/docs/llms.txt
> Use this file to discover all available pages before exploring further.
# Configuration
> Configure the bunny.net cPanel plugin settings including API keys, nameservers, and logging.
The bunny.net cPanel plugin uses a configuration file located at `/etc/bunnynet.conf`. This file is created automatically during setup, but you can edit it to customize the plugin behavior.
## Configuration file
```bash theme={null}
/etc/bunnynet.conf
```
After making changes to the configuration file, restart the daemon:
```bash theme={null}
systemctl restart bunnynet-cpanel-daemon
```
## Required settings
| Key | Description |
| :- | :- |
| `BUNNYNET_API_KEY` | Your bunny.net account API key. Available in [dash.bunny.net](https://dash.bunny.net/account/api-key). |
| `WHM_API_KEY` | The WHM API token. Automatically generated during setup. Managed in **WHM > Development > Manage API Tokens**. |
## Optional settings
| Key | Description | Default value |
| :- | :- | :- |
| `NS1` | Primary nameserver | `kiki.bunny.net` |
| `NS2` | Secondary nameserver | `coco.bunny.net` |
| `SOA_EMAIL` | SOA email address | `hostmaster@bunny.net` |
| `DOH_RESOLVER` | DNS over HTTPS resolver | `https://dns.quad9.net` |
| `LOG_LEVEL` | Log level (`debug`, `info`, `warn`, `error`) | `warn` |
| `URL_PURGE_WORKERS` | Number of workers for URL cache purging | `2` |
## DNS cluster settings
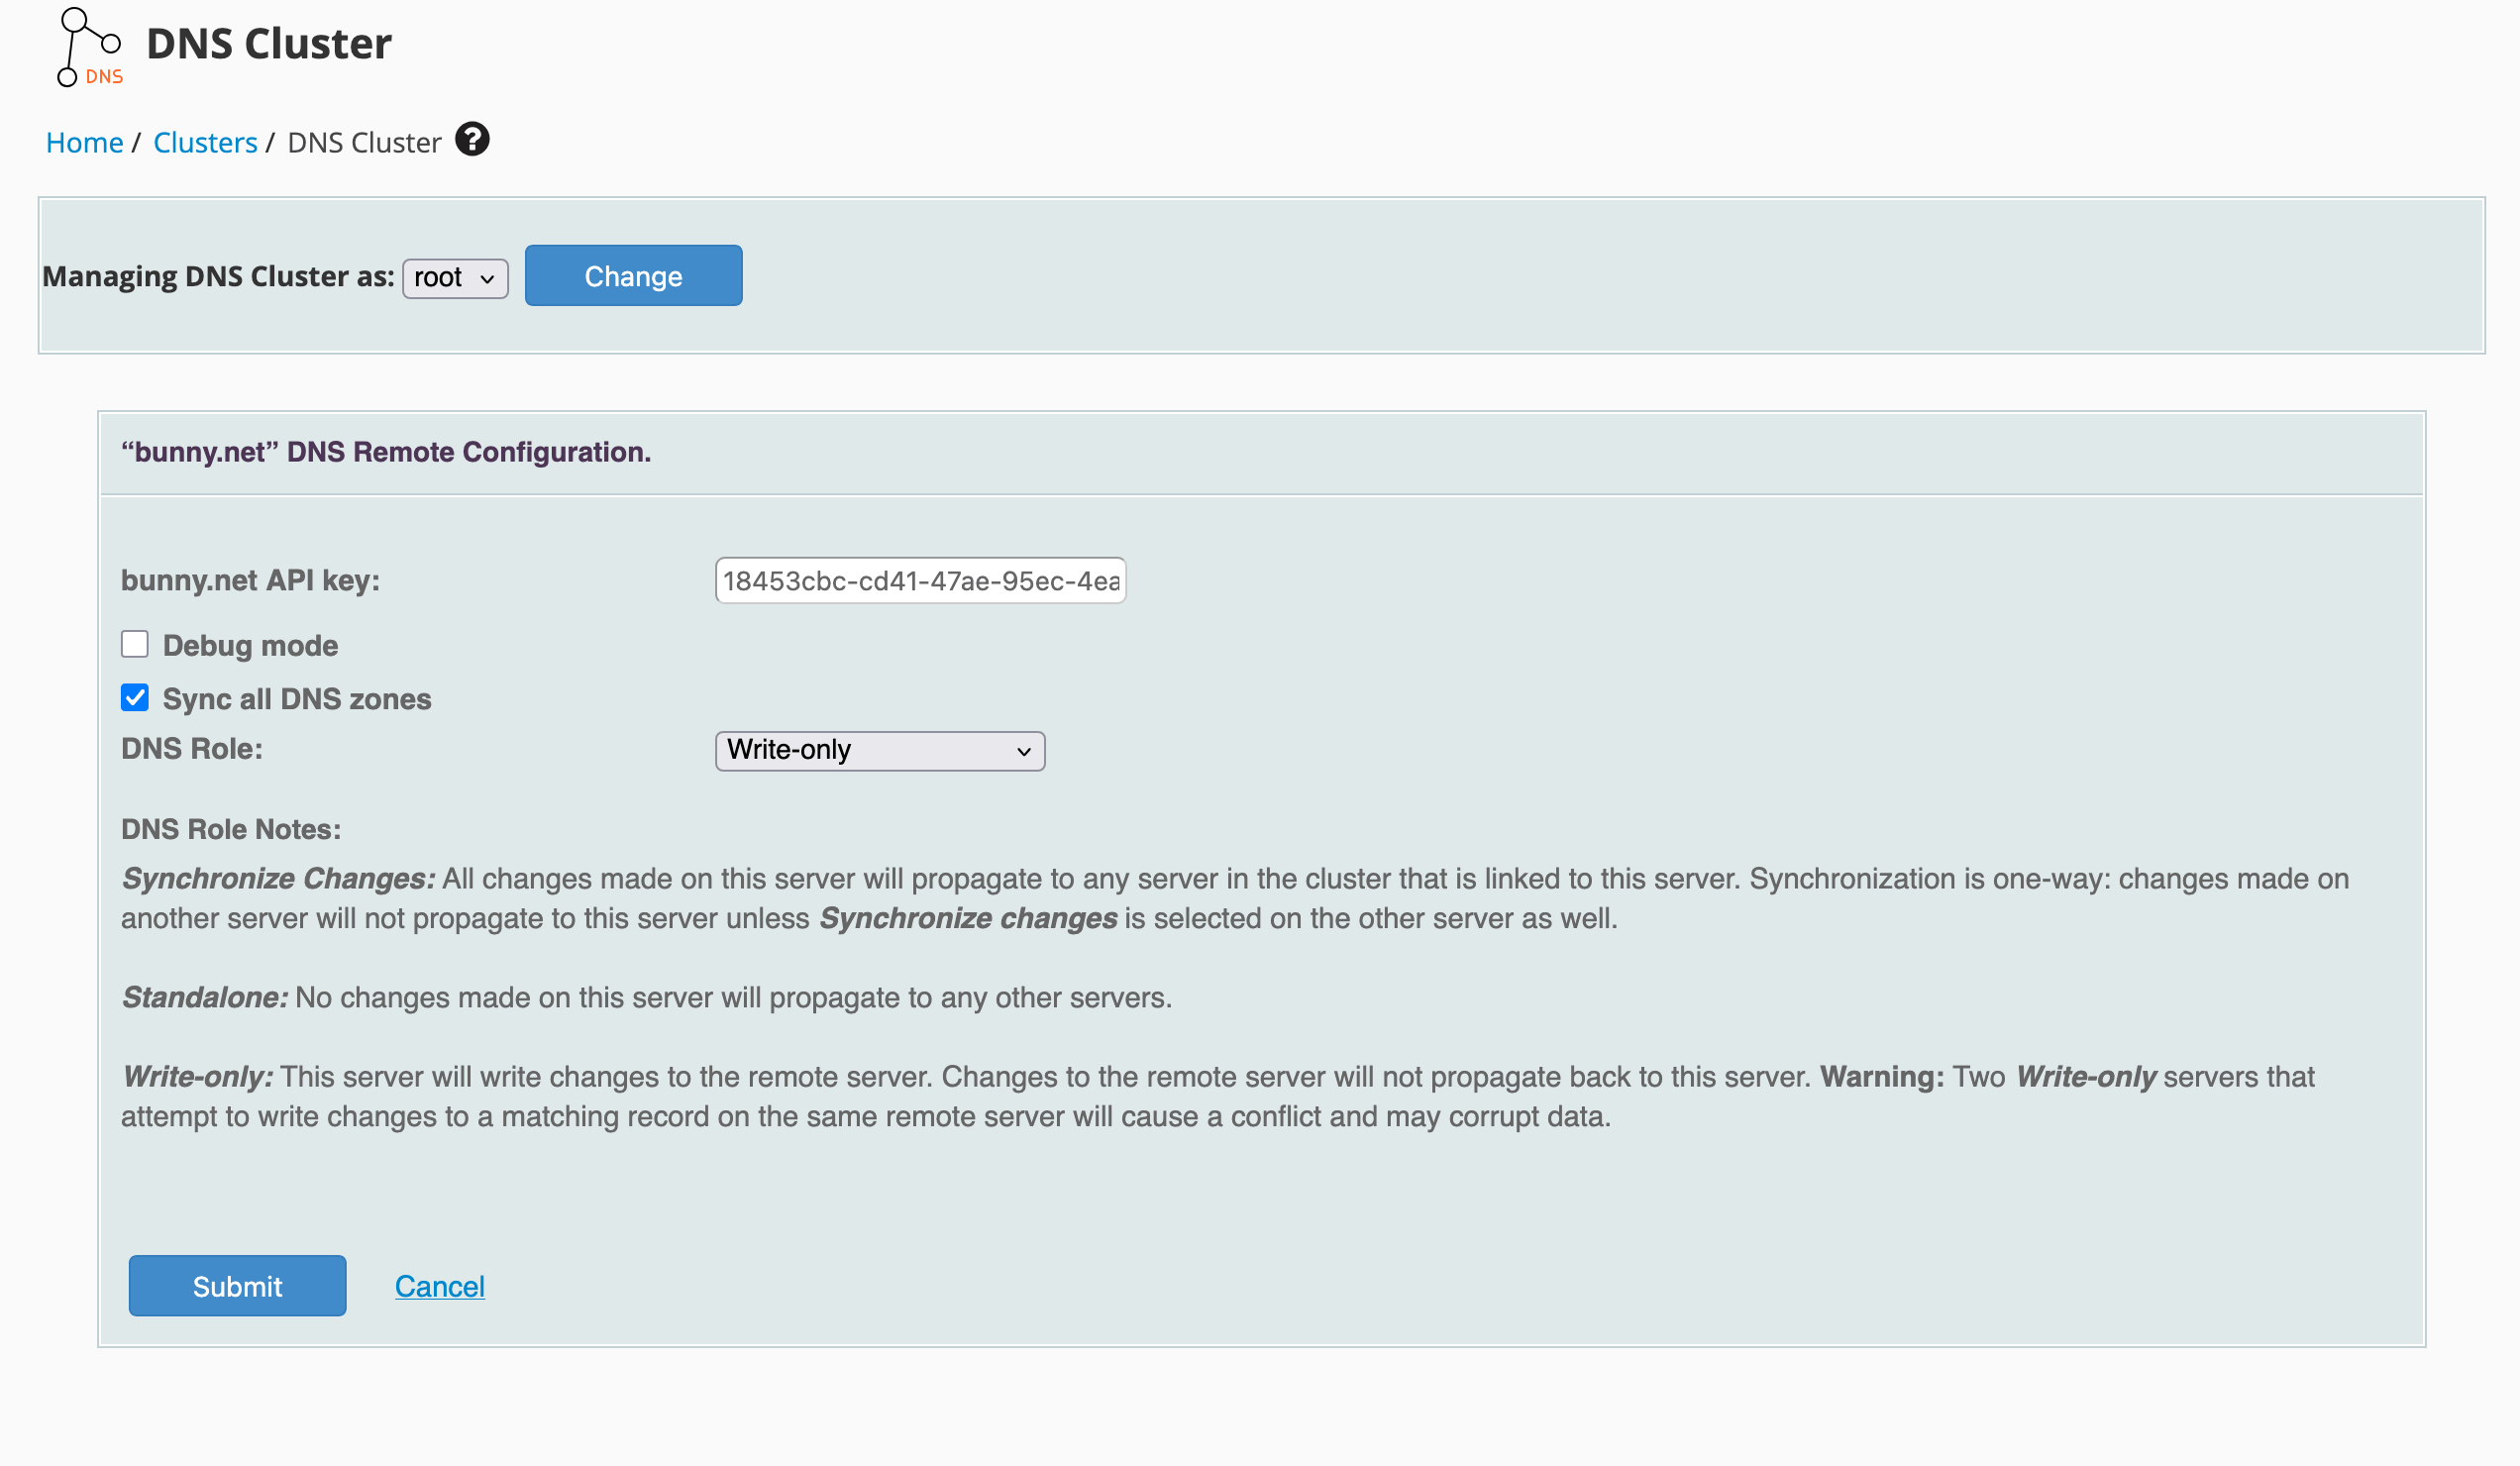
The DNS cluster configuration is available in **WHM > Clusters > DNS Cluster**. In addition to the API key, you can enable:
* **Sync all DNS zones** — Automatically synchronize all existing DNS zones to the cluster. Enable this if you want all DNS zones to be pushed to Bunny DNS.
 ## Hosting packages
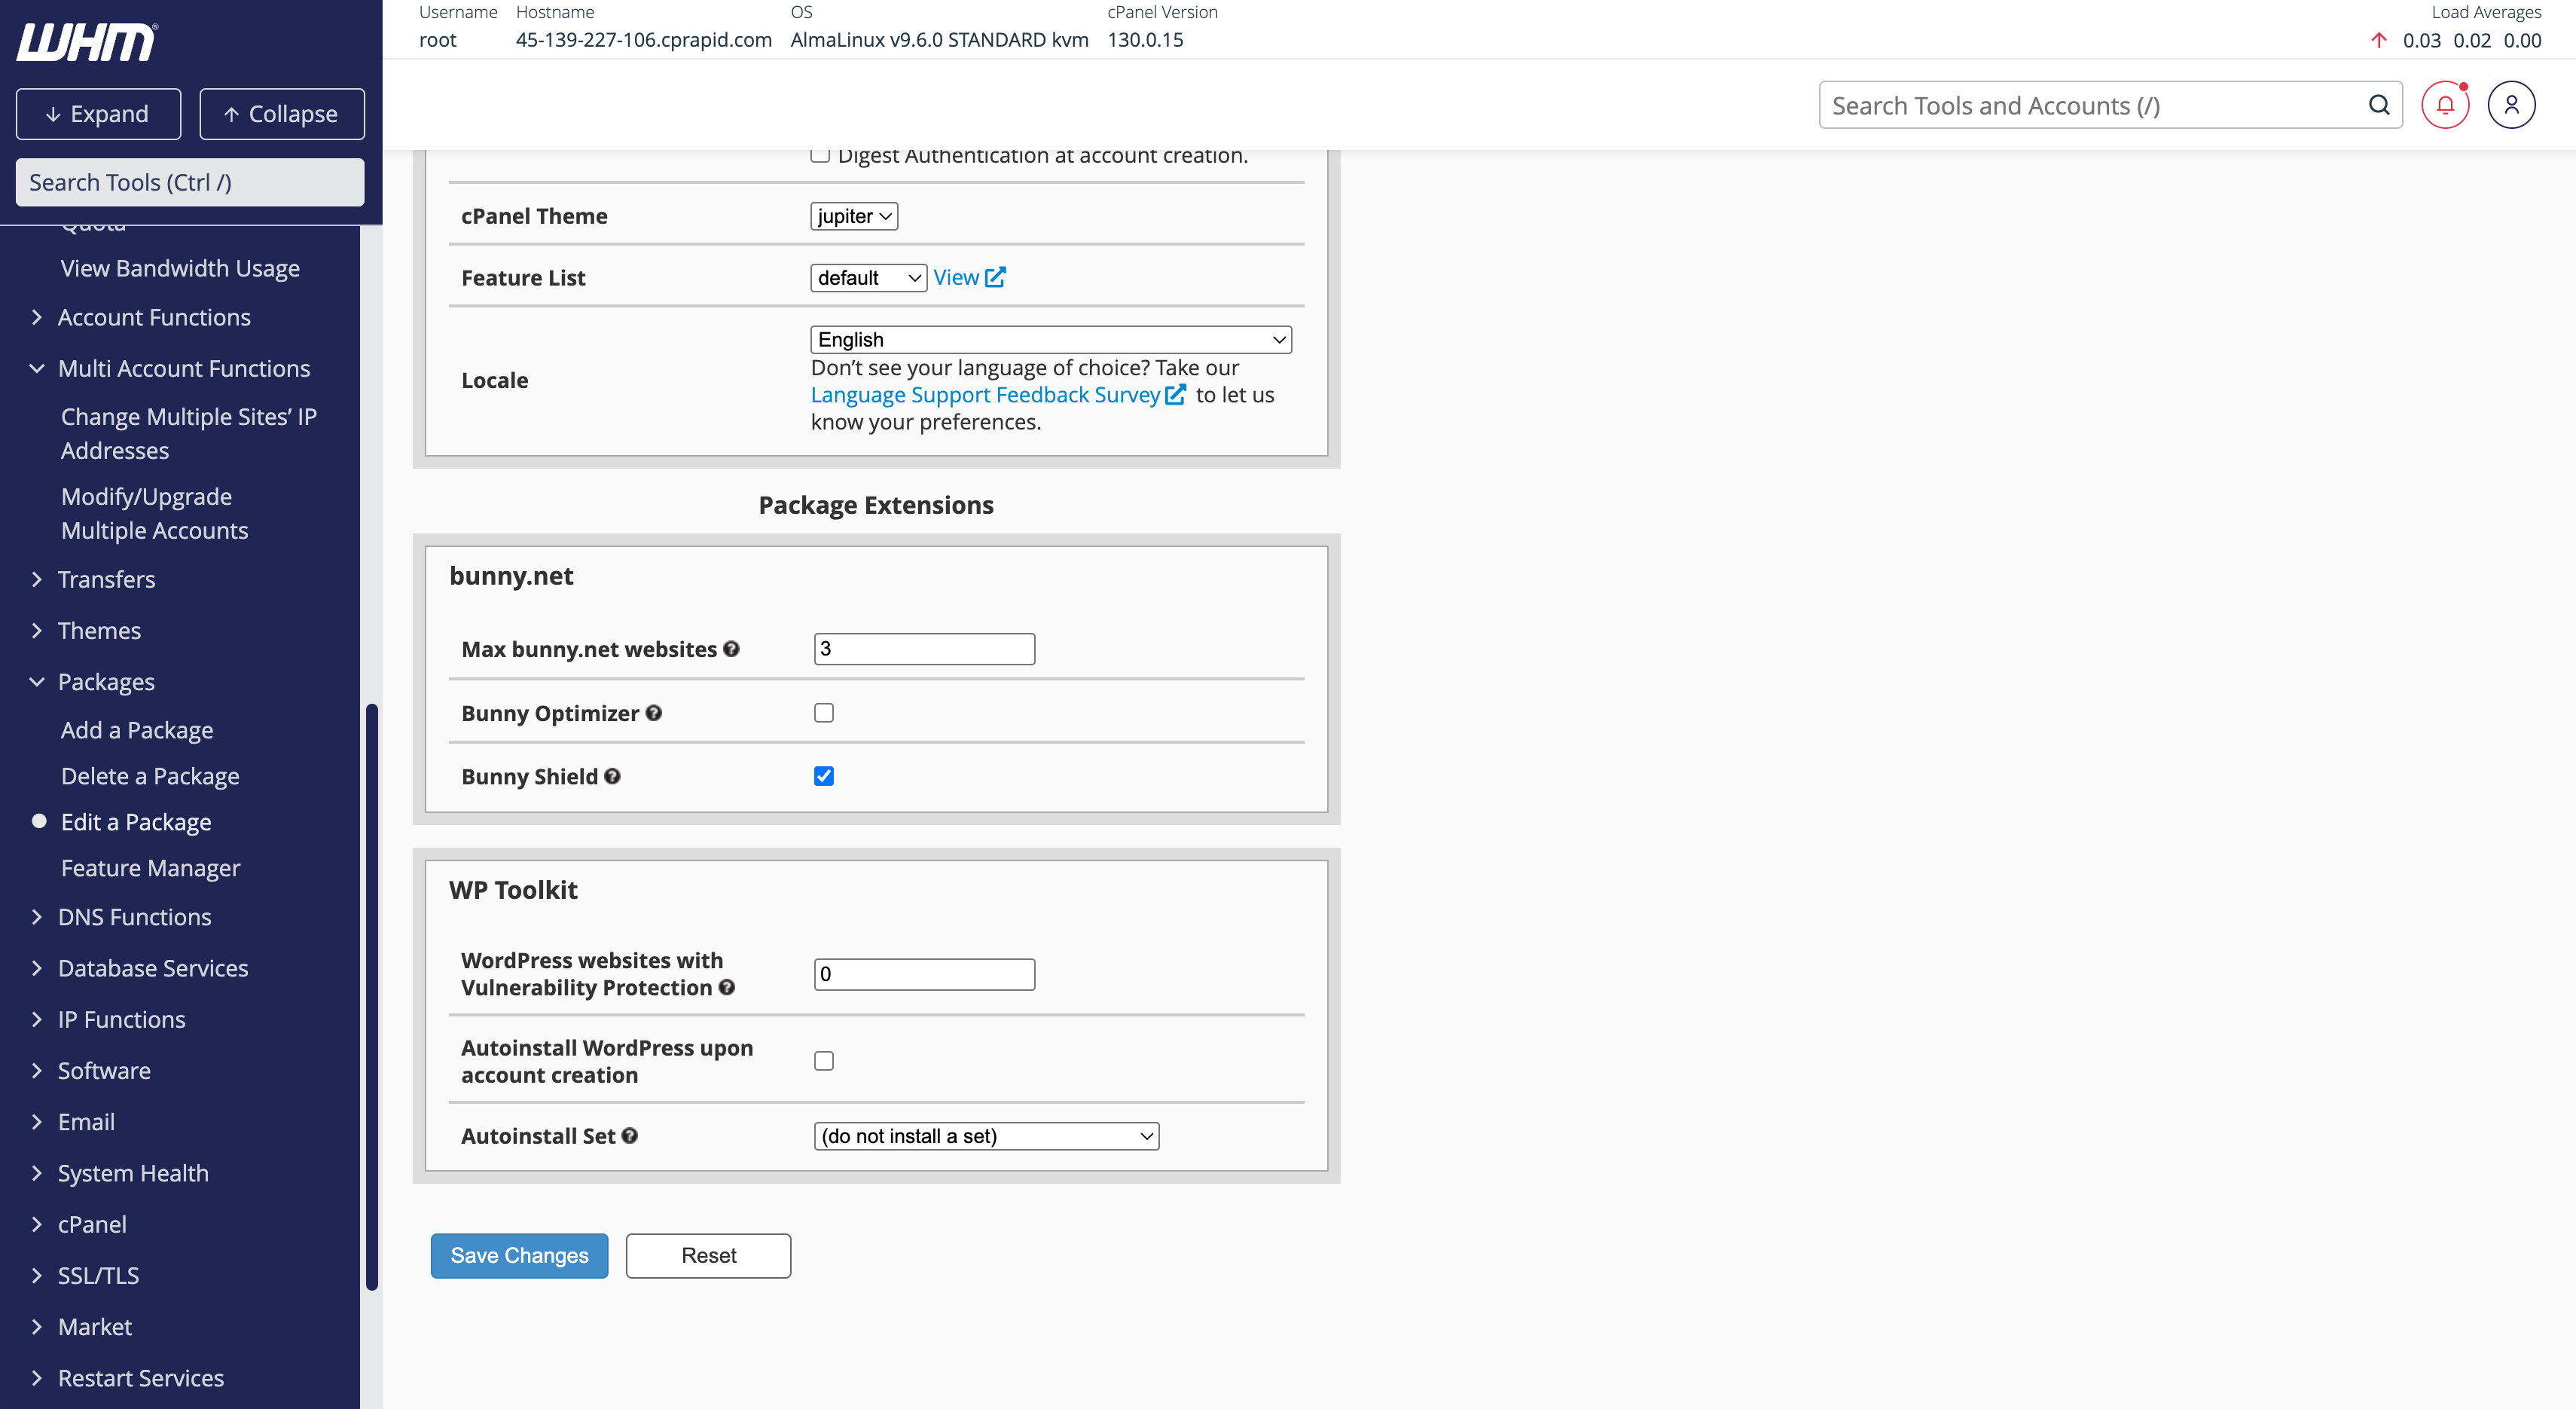
You can configure bunny.net features per hosting package in **WHM > Packages > Edit a Package**. The following options are available under the **bunny.net** section:
* **Max bunny.net websites** — Limit the number of websites that can use bunny.net per account
* **Bunny Optimizer** — Allow users to enable and manage Bunny Optimizer
* **Bunny Shield** — Allow users to manage DDoS protection and WAF
Make sure to set **Max bunny.net websites** to at least `1`. Setting it to `0` will prevent customers on that package from enabling bunny.net for any of their websites. Use `-1` for unlimited.
## Hosting packages
You can configure bunny.net features per hosting package in **WHM > Packages > Edit a Package**. The following options are available under the **bunny.net** section:
* **Max bunny.net websites** — Limit the number of websites that can use bunny.net per account
* **Bunny Optimizer** — Allow users to enable and manage Bunny Optimizer
* **Bunny Shield** — Allow users to manage DDoS protection and WAF
Make sure to set **Max bunny.net websites** to at least `1`. Setting it to `0` will prevent customers on that package from enabling bunny.net for any of their websites. Use `-1` for unlimited.
 ## Hiding the plugin for certain packages
If you want to hide the bunny.net plugin from customers on specific packages, you can use WHM's Feature Manager to create a feature list that excludes it.
In WHM, go to **Packages > Feature Manager**. Create a new feature list or edit an existing one.
In the feature list, uncheck **bunny.net** to hide the plugin from cPanel for customers using this feature list.
Go to **Packages > Edit a Package**, select the package you want to restrict, and set the **Feature List** to the one you created.
Customers on packages with this feature list will no longer see the bunny.net plugin in their cPanel.
This documentation is built and hosted on [Mintlify](https://mintlify.com), a developer documentation platform.
## Hiding the plugin for certain packages
If you want to hide the bunny.net plugin from customers on specific packages, you can use WHM's Feature Manager to create a feature list that excludes it.
In WHM, go to **Packages > Feature Manager**. Create a new feature list or edit an existing one.
In the feature list, uncheck **bunny.net** to hide the plugin from cPanel for customers using this feature list.
Go to **Packages > Edit a Package**, select the package you want to restrict, and set the **Feature List** to the one you created.
Customers on packages with this feature list will no longer see the bunny.net plugin in their cPanel.
This documentation is built and hosted on [Mintlify](https://mintlify.com), a developer documentation platform.